New APK Market iMarketApk » Yahoo Mail – Free Email App v4 8 8

Yahoo Mail – Free Email App v4.8.8

Requirements

http://iMarketApk.blogspot.com/ [New] APK Market iMarketApk » Yahoo Mail – Free Email App v4.8.8 [Torrent Modded apk] Free APK are available on every other topic you can think of in both fiction and non-fiction of. There are free Android APK available for adults and children and even between and teenagers. It may seem overwhelming to find and download [android apk] Hack no survey [New] APK Market iMarketApk » Yahoo Mail – Free Email App v4.8.8 ҩ MOD but with the steps below youll be just minutes away from getting APK.: 4.0.3 and up

http://iMarketApk.blogspot.com/ - Overview about Yahoo Mail – Free Email App v4.8.8

Full Download MOd [New] APK Market iMarketApk » Yahoo Mail – Free Email App v4.8.8 and Torrent Link

: Experience the faster, smarter, richer Yahoo! Mail- made for your Android phone

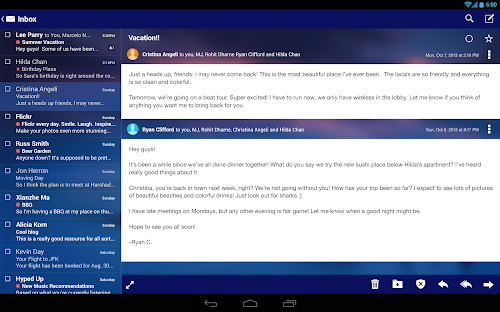
Free APK Yahoo Mail – Free Email App v4.8.8

Meet the multi-talented Yahoo Mail app. The email app you love is now enhanced with personalized news, Web search, and daily snapshots of the weather, News Digest, sports scores, popular videos and more.

Manage your mail with 1TB of free space. Receive instant alerts when new email arrives. Search to easily find messages, photos, and files in your inbox. Personalize your inbox with stunning Flickr themes that sync across all your devices.

Favorite features:

- Switch between all of your Yahoo email accounts in one place.

- Never miss a message with instant email alerts.

- Search for a person’s name to see messages, photos, and files they sent you.

- Stay on top of the stories you care about under the News section.

- Tap on Today to search the web, and check info you need at a glance: your upcoming flight and events, today’s weather, sports scores, News Digest, popular videos and more.

Helpful tips:

- Access all your Folders, Drafts, and Sent Mail from the Mail sidebar.

- Bulk-sort your mail by selecting multiple messages at once.

- Swipe left or right in message view to navigate between messages.

- Read messages in full-screen with a tablet optimized experience.

Tell us what you think:

We are committed to building the best mobile experiences and would love to hear your feedback.

Let us know your thoughts here: Download Url

Note: Some features are not available in all countries. Yahoo does not provide a local Swiss email service.

By clicking "install" you consent to the installation of this app and updates to this app in the future. This app can be uninstalled at any time

This app has no advertisements

More Info Yahoo Mail – Free Email App v4.8.8

You can directly download the apk file with torent modded or just in iMarketApk

Android APK Files [New] APK Market iMarketApk » Yahoo Mail – Free Email App v4.8.8 Full And No Hack No Survey No ROOT

:

https://play.google.com/store/apps/d...oid.mail&hl=en

Download Instructions:

Download Url

Mirror:

Download Url

Download Url

Read More..

How to Manually Configure Your Email Account on Your Android Phone

Many people who have Android phones wish to access their emails at any time while on the go. However, manually configuring an email account is often tricky. This article will give you a step by step guide on how to manually configure your email account on your Android phone.

The hardest part of configuring your email account manually is knowing what information you need to enter. Once you have the information, configuring the rest of your account is very easy! Therefore, before we begin, let’s figure out what information we need!

Email address: the email address for the account that you are trying to set up

Password: the password for the email address that you are setting up
Server namemail.YourDomain.com (ex: mail.Arvixe.com) If mail.YourDomain.com doesn’t work, you will find this information in your webmail login under Settings then Email Accounts.

Incoming and Outgoing Server Ports: For the incoming server, this may be 143. For the outgoing server, this may be 25. If port 143 or 25 does not work, you can easily find this information in your webmail login under Settings then Email Accounts.

Now that we have the information ready, let’s set up the email account on your Android phone!
1) Go to Settings

2) Tap on Accounts

3) Then select Add Account

4) Choose Email

5) Enter the email address you are adding and the password

6) Uncheck the Automatically configure account box

7) Tap Next

8 ) Select General Settings

9) For Account name, enter the desired name for this account. For Real name, enter your real name. For Email address, enter your email address.

10) Select OK

11) Select Incoming Server

12) Tap where it says POP mail server and select IMAP mail server

13) Enter your connection details. For Server, enter your domain’s mail server. Most of the time, it is mail.YourDomain.com (ex: mail.Arvixe.com). If mail.YourDomain.com doesn’t work, you will find this information in your webmail login under Settings then Email Accounts. For Username, enter your email address. For Password, enter the correct password for the email address.

14) Tap Advanced settings

15) Make sure Use secure connection and Verify Certificate are unchecked

16) For Port, enter 143. If port 143 does not work, you can easily find this information in your webmail login under Settings then Email Accounts.

17) Tap OK

18 ) Tap OK again

19) Select Outgoing Server

20) Enter your connection details. For SMTP server, enter your domain’s mail server. Most of the time, it is mail.YourDomain.com (ex: mail.Arvixe.com). If mail.YourDomain.com doesn’t work, you will find this information in your webmail login under Settings then Email Accounts. For Username, enter your email address. For Password, enter the correct password for the email address.

21) Tap Advanced settings

22) Make sure Use secure connection and Verify Certificate are unchecked

23) For Port, enter 25. If port 25 does not work, you can easily find this information in your webmail login under Settings then Email Accounts.

24) Tap OK

25) Tap OK

26) Tap OK one more time to finish configuring your email account.

You will now see your email account listed.

Note:
With the current settings in this tutorial, any emails that you send or receive will not be secure. This means that everything sent or received can be intercepted as clear text. This is due to the certificate naming conflict between your mail account and your domain. Because of the conflict, the phone would display an error and show a connection failure. However, when we chose to deselect the certificate validation in the settings, we were able to bypass this problem.
If you encounter an error, please double check that your information is entered properly, or that your server name and ports are correct. If you continue experiencing difficulties manually configuring your email account, feel free to leave a comment and ask for help!
This concludes how to manually configure your email account on your Android phone

picts and source http://blog.arvixe.com
How to Manually Configure Your Email Account on Your Android Phone
Read More..

Create a calendar event or contact directly from email

Create an iPhone event directly from email iPhone/iPad tip: Create a calendar event or contact directly from emailAn invite to a can’t-miss event just landed in your inbox, and you want to mark it in your iPhone’s calendar before you forget—and while you’re at it, you’d like to add the sender’s name to your address book.
Well, good news: you’re just a few taps away from saving the date in your iPhone’s (or iPad’s) Calendar app, or from creating a new entry in your Contacts app—all directly from the original email message.
Here’s how…

Create a calendar event from email

  • Open the email, look for the date and time (which should already be highlighted in blue by your iPhone), tap it, then tap the “Create Event” button from the slide-up window. Once you do, an “Add Event” window will appear with the salient details already filled in.
  • iPhone Add Event screen 249x300 iPhone/iPad tip: Create a calendar event or contact directly from email
    Once you tap the “Create Event” button, an “Add Event” screen will appear with the salient details already filled in.

  • Go ahead and edit the new event or add more information (such as a location or a reminder), then tap the “Done” button. You’re all set!
  • You can also tap “Show in Calendar” to see if you’re free during that time slot, or “Copy” to copy the date and time to the iPhone’s virtual clipboard.

Create a contact

  • Go to the top of the email, tap the name you’d like to save in the “From:” field, and then tap the “Create New Contact” button.
  • A new contact form will appear with the name and email fields completed. Edit or add more details as you see fit, then tap the “Done” button.
Create a calendar event or contact directly from email
Read More..

How to shrink a photo before sending it via email

Shrink an iPad photo before sending it via email iPad tip: How to shrink a photo before sending it via emailSandra writes: I sent a photo from my iPad to my Virgin email. The photo came out very large even though it was a JPEG. Could you please advise what I can do [to make it smaller]? The iPad is an iPad 3.
Hi Sandra! I must admit, I was a little puzzled when I first read your question.
After all, doesn’t the iPad automatically ask you whether you’d like to shrink a large, about-to-be-emailed photo, just like the iPhone does?
I gave it a try with my own iPad 3, and lo and behold: no pop-up asking if I really want to send a massive, multi-megabyte photo as an email attachment.
Instead, my iPad just pasted the full-size snapshot (1.3 megabytes, to be exact) into my email message and sent it, no questions asked.
Image Size settings for email on iPad 300x165 iPad tip: How to shrink a photo before sending it via email
Yes, you can shrink a photo before sending it via email on the iPad, provided you know where to tap.
So, what gives?
Well, it turns out you can reduce the size of a photo attachment before hitting the “Send” button, provided you know where to tap.
Here’s how…
  • First, let’s dive into the iPad’s Camera Roll in the Photos app, and find a great snapshot to send as an email attachment. Got one? Tap the Share button (it’s the one in the top-right corner of the screen, with a curved arrow), then tap the Mail icon.
  • Your iPad will automatically paste your photo (or photos, if you selected more than one) into a blank email message. Go ahead and fill in the “To:” and “Subject” lines, and add a message in the body of the email if you wish.
  • Now, here’s the trick: see the “CC/BCC” line, just below the “To” line? Look over to the right, and you’ll see a little text that reads “Images: 1.3 MB” (the size will vary depending on the image). Tap the “CC/BCC” line to expand it—and suddenly, you’ll see a series of four “Image Size” options: Small, Medium, Large, and Actual Size. Tap one of the buttons to shrink the photo down to size.
  • All set? Go ahead and tap the “Send” button.
How to shrink a photo before sending it via email
Read More..

Powered by Blogger.